I have always been intrigued with the idea of doing a Gallery Wall in my house. You know, the grouping and hanging of somewhat random (or perhaps not so random) things on a wall in your home. I was for whatever reason, a little intimidated by the idea. I hang tons of stuff on my walls, but the idea of finding a bunch of things that would look good together seemed challenging. Plus, when I looked at Pinterest for inspiration, I always felt like I could never do something as pretty or as professional looking as what I see on there.
But, I have this very large wall in my bedroom and it's been blank for over 2 months now. And I REALLY don't like blank walls. It's like the walls are calling to me saying "put something on me," "cover me up," "don't leave me bare." And, since I can't afford a really large, nice, piece of art, I decided to go for it and put up a gallery wall in my bedroom. Surprise! As it turns out, I can do it. And, I'm pretty happy with it. So I thought it would be good to tell you my tips for doing your own gallery wall because it's really not as challenging as it seems!

First things first, gather some materials. I would recommend finding 15-20 different "things" that you think you could hang on your walls. Try to find different shapes and sizes. Picture frames are great, but I also think it's fun to add a couple of pieces that aren't necessarily photos. Don't be afraid to not have everything match, but try to have a certain color scheme or vibe that you are going for. Our bedroom has predominately dark wood furniture as well as vintage white pieces and light blue/green bedding, so I gathered my items based on that.
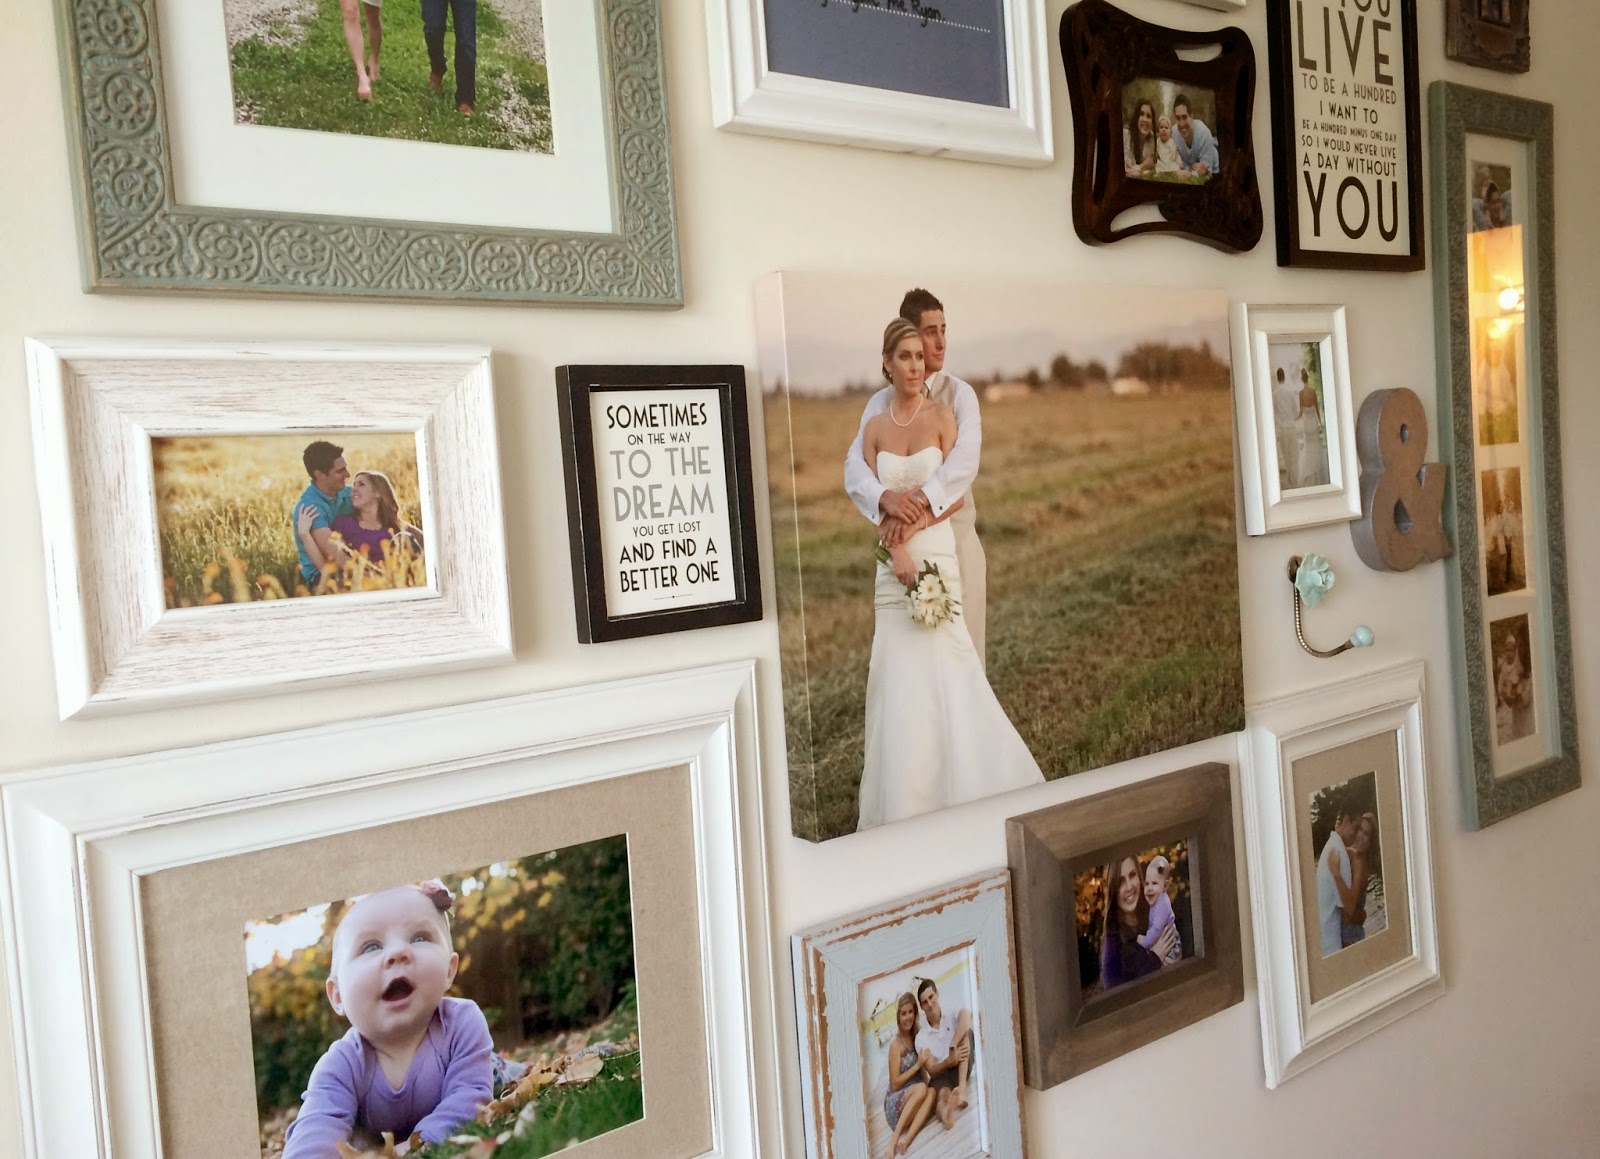
About half of the items I used on this wall, I already had. I just went rummaging around my apartment looking for things that I wasn't using that would work on this wall. The other half, I found at stores like Home Goods, Pier 1, Target, and Anthropologie. But, I didn't get them all in one day. I find it's best to find things over time and that way you don't feel like you are breaking the bank either. If you know you eventually want to put up a gallery wall in your home, start browsing the hanging home decor sections at some of these stores and pick up a piece here or there. Eventually, you will have enough to put together a wall. Also, if you are using photos, find some that also work with your color scheme which helps to bring it all together.

Once you have enough items, I suggest finding a spot you can lay out all your pieces in order to find the best arrangement. I used our bed, mostly because if I tried to use the floor Ryan would have been ALL up in that. I tried LOTS of different arrangements. I probably spent at least an hour or more arranging and rearranging these items. I took pictures of the designs I liked best so that I could go back to them for reference. I had about 20 different items and I only used 17 on my wall, so I kept switching out different things for others.

Once you are happy with the layout (on the ground), first make sure you have a picture of it before you start hanging! Then, I have seen a couple ways of hanging. Some people suggest tracing paper the size of each piece and then taping that to your wall so you know where you are hanging things. I'm sure that works great. But honestly, ain't nobody got time for that! Okay, maybe some people do, but I don't. Or I don't have the patience to do that. Either way, I'm more a just take a hammer and go with it girl. My large canvas print was my focal point, (almost) centered piece, so I started with that and worked my way out referencing the photo I had taken of the arrangement the whole way.
I may or may not have ended up with a couple of extra nail holes in my wall by doing it this way, but you can't see them and I feel like 2 extra nail holes can be considered nothing short of success. At least in my book!
I'm pretty thrilled with the outcome and it almost makes me wish that I had another large blank wall in my apartment so I could do another one!


No comments:
Post a Comment